Series: Kubernetes at home
- Kubernetes at home - Part 1: The hardware - January 02, 2021
- Kubernetes at home - Part 2: The install - January 05, 2021
- Kubernetes at home - Part 3: HAProxy Ingress - January 05, 2021
Kubernetes at home - Part 4: DNS and a certificate with HAProxy Ingress - January 07, 2021
- Kubernetes at home - Part 5: Keycloak for authentication - January 16, 2021
- Kubernetes at home - Part 6: Keycloak authentication and Azure Active Directory - January 17, 2021
- Kubernetes at home - Part 7: Grafana, Prometheus, and the beginnings of monitoring - January 26, 2021
- Kubernetes at home - Part 8: MinIO initialization - March 01, 2021
- Kubernetes at home - Part 9: Minecraft World0 - April 24, 2021
- Kubernetes at home - Part 10: Wiping the drives - May 09, 2021
- Kubernetes at home - Part 11: Trying Harvester and Rancher on the bare metal server - May 29, 2021
- Kubernetes at home - Part 12: Proxmox at home - December 23, 2021
Kubernetes at home - Part 4: DNS and a certificate with HAProxy Ingress
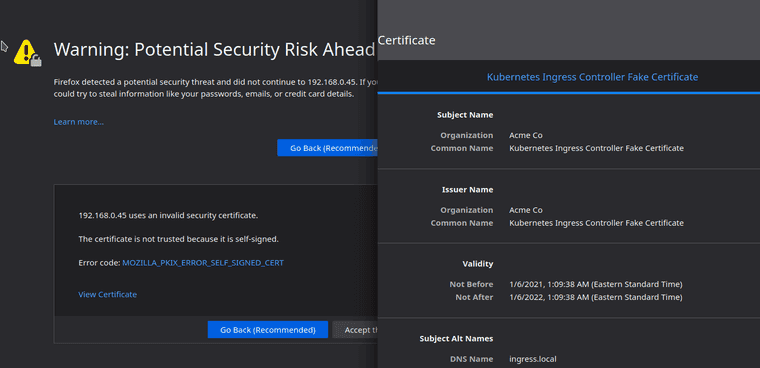
In this post I’m looking at acquiring certificates in order to not worry about errors on my websites from self-signed certificates. The problem is well summarized with the below screenshot of the problem.
DNS
The first piece I want to tackle here is DNS. I’ve made some purposeful decisions here in order to have a reasonable set of constraints.
- I don’t mind only being able to access my self-hosted websites while on my private network. No public internet access.
- I can guarantee a static IP address for my single-node Kubernetes cluster. No need for updating IP addresses for DNS.
- I intend to use DNS-01 challenge in order to get certificates from the fantastic Let’s Encrypt. My reasoning for DNS-01 is that Let’s Encrypt wouldn’t be able to reach my Kubernetes cluster for HTTP-01 challenge.
I have several domain names that are no longer in use, so one of those are due for recycling.
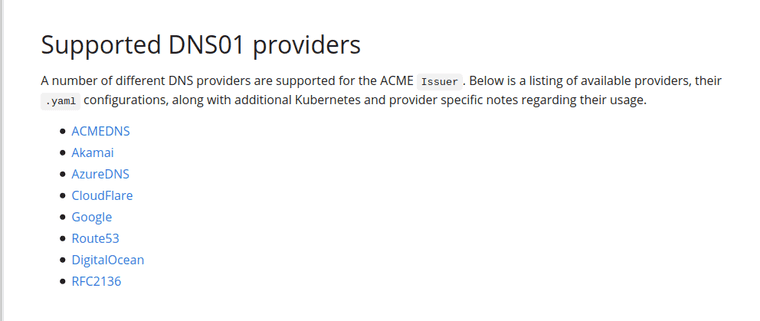
Unfortunately, the service in which those particular domain names are registered is not supported via Certificate Manager. Certificate Manager is the Kubernetes certificate management controller I have chosen.
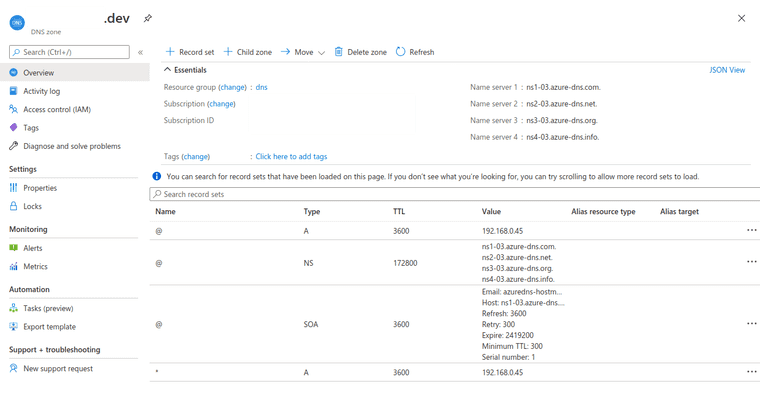
AzureDNS is the immediate option above that jumps out at me since I have some Azure credits to use. It was easy enough to point nameservers to Azure. I redacted the domain name, which altered the below screenshot slightly.
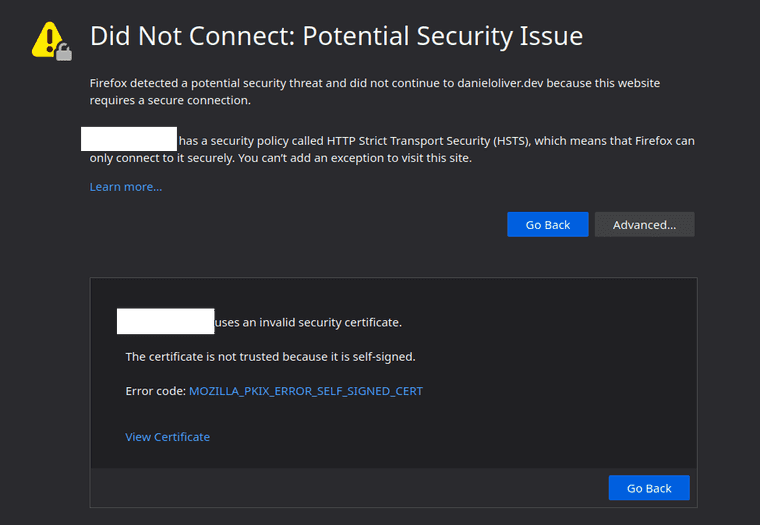
Now when I go to my domain name, I get to the right server so long as I’m on this private network. Still, errors, but progress.
Certificate Manager
Jumping over to Certificate Manager now, I’m going to install this using the Helm chart with the CRD option set to true. First, I have to add the repo.
daniel@bequiet:~$ helm repo add jetstack https://charts.jetstack.io
"jetstack" has been added to your repositories

daniel@bequiet:~$ helm repo update
Hang tight while we grab the latest from your chart repositories...
...Successfully got an update from the "haproxy-ingress" chart repository
...Successfully got an update from the "jetstack" chart repository
Update Complete. ⎈ Happy Helming!⎈

daniel@bequiet:~$ helm search repo cert
NAME                    CHART VERSION   APP VERSION     DESCRIPTION
jetstack/cert-manager   v1.1.0          v1.1.0          A Helm chart for cert-manager
With the chart present, I can go ahead and install.
daniel@bequiet:~$ helm install \
>   cert-manager jetstack/cert-manager \
>   --namespace cert-manager \
>   --version v1.1.0 \
>   --set installCRDs=true \
>   --create-namespace

NAME: cert-manager
LAST DEPLOYED: Wed Jan  6 02:13:06 2021
NAMESPACE: cert-manager
STATUS: deployed
REVISION: 1
TEST SUITE: None
NOTES:
cert-manager has been deployed successfully!

In order to begin issuing certificates, you will need to set up a ClusterIssuer
or Issuer resource (for example, by creating a 'letsencrypt-staging' issuer).

More information on the different types of issuers and how to configure them
can be found in our documentation:

https://cert-manager.io/docs/configuration/

For information on how to configure cert-manager to automatically provision
Certificates for Ingress resources, take a look at the `ingress-shim`
documentation:

https://cert-manager.io/docs/usage/ingress/
Certificate Manager seems to have installed.
daniel@bequiet:~$ kubectl get all --namespace cert-manager
NAME                                           READY   STATUS    RESTARTS   AGE
pod/cert-manager-756bb56c5-gpcd9               1/1     Running   0          32s
pod/cert-manager-cainjector-86bc6dc648-qz8dn   1/1     Running   0          32s
pod/cert-manager-webhook-66b555bb5-8255r       1/1     Running   0          32s

NAME                           TYPE        CLUSTER-IP     EXTERNAL-IP   PORT(S)    AGE
service/cert-manager           ClusterIP   10.104.41.50   <none>        9402/TCP   32s
service/cert-manager-webhook   ClusterIP   10.99.254.16   <none>        443/TCP    32s

NAME                                      READY   UP-TO-DATE   AVAILABLE   AGE
deployment.apps/cert-manager              1/1     1            1           32s
deployment.apps/cert-manager-cainjector   1/1     1            1           32s
deployment.apps/cert-manager-webhook      1/1     1            1           32s

NAME                                                 DESIRED   CURRENT   READY   AGE
replicaset.apps/cert-manager-756bb56c5               1         1         1       32s
replicaset.apps/cert-manager-cainjector-86bc6dc648   1         1         1       32s
replicaset.apps/cert-manager-webhook-66b555bb5       1         1         1       32s
Putting together DNS and Certificate Manager
Now that Certificate Manager is installed and Azure DNS is configured, I want to enable Certificate Manager to use that domain name to get certificates via the DNS-01 challenge.
Using the instructions for Certificate Manager to use Service Principal with Azure, I run the following commands. Do note that “yourdomain” is substituting my specific domain. Be sure to not skip the Azure CLI login. Also do change any of the below names to your preferences.
# Choose a name for the service principal that contacts azure DNS to present the challenge
AZURE_CERT_MANAGER_NEW_SP_NAME=dns_service_principal
# This is the name of the resource group that you have your dns zone in
AZURE_DNS_ZONE_RESOURCE_GROUP=dns
# The DNS zone name. It should be something like domain.com or sub.domain.com
AZURE_DNS_ZONE=yourdomain.dev

DNS_SP=$(az ad sp create-for-rbac --name $AZURE_CERT_MANAGER_NEW_SP_NAME)
AZURE_CERT_MANAGER_SP_APP_ID=$(echo $DNS_SP | jq -r '.appId')
AZURE_CERT_MANAGER_SP_PASSWORD=$(echo $DNS_SP | jq -r '.password')
AZURE_TENANT_ID=$(echo $DNS_SP | jq -r '.tenant')
AZURE_SUBSCRIPTION_ID=$(az account show | jq -r '.id')

az role assignment delete --assignee $AZURE_CERT_MANAGER_SP_APP_ID --role Contributor

DNS_ID=$(az network dns zone show --name $AZURE_DNS_ZONE --resource-group $AZURE_DNS_ZONE_RESOURCE_GROUP --query "id" --output tsv)
az role assignment create --assignee $AZURE_CERT_MANAGER_SP_APP_ID --role "DNS Zone Contributor" --scope $DNS_ID

az role assignment list --all --assignee $AZURE_CERT_MANAGER_SP_APP_ID

kubectl create secret generic azuredns-config --from-literal=client-secret=$AZURE_CERT_MANAGER_SP_PASSWORD --namespace cert-manager

echo "AZURE_CERT_MANAGER_SP_APP_ID: $AZURE_CERT_MANAGER_SP_APP_ID"
echo "AZURE_CERT_MANAGER_SP_PASSWORD: $AZURE_CERT_MANAGER_SP_PASSWORD"
echo "AZURE_SUBSCRIPTION_ID: $AZURE_SUBSCRIPTION_ID"
echo "AZURE_TENANT_ID: $AZURE_TENANT_ID"
echo "AZURE_DNS_ZONE: $AZURE_DNS_ZONE"
echo "AZURE_DNS_ZONE_RESOURCE_GROUP: $AZURE_DNS_ZONE_RESOURCE_GROUP"
Once the Azure configuration is done, I’ve picked out the above values for use in defining a ClusterIssuer. The reason to pick a ClusterIssuer over an Issuer is that “an Issuer is a namespaced resource, and it is not possible to issue certificates from an Issuer in a different namespace.” If possible, I’m going to stick with subdomains on the one domain for as long as I can.
apiVersion: cert-manager.io/v1
kind: ClusterIssuer
metadata:
  name: yourdomaindev-clusterissuer
spec:
  acme:
    email: yourdomain@anyemail.com
    server: https://acme-v02.api.letsencrypt.org/directory
    privateKeySecretRef:
      # Secret resource that will be used to store the account's private key.
      name: yourdomaindev-issued-private-key
    solvers:
    - dns01:
        azureDNS:
          clientID: <redacted>
          clientSecretSecretRef:
          # The following is the secret we created in Kubernetes. Issuer will use this to present challenge to Azure DNS.
            name: azuredns-config
            key: client-secret
          subscriptionID: <redacted>
          tenantID: <redacted>
          resourceGroupName: dns
          hostedZoneName: yourdomain.dev
          environment: AzurePublicCloud
The ClusterIssuer should be ready pretty quickly.
daniel@bequiet:~$ kubectl get ClusterIssuer
NAME                            READY   AGE
yourdomaindev-clusterissuer   True    88s
Testing Certificate Manager with HAProxy
In order to test certificates along with HAProxy, I use the below echoserver.yml which creates Ingress, Service, and Deployment.
apiVersion: networking.k8s.io/v1
kind: Ingress
metadata:
 name: api-ingress
 annotations:
  cert-manager.io/cluster-issuer: yourdomaindev-clusterissuer
  kubernetes.io/ingress.class: haproxy
  kubernetes.io/ingress.allow-http: "true"
  haproxy.org/forwarded-for: "enabled"
spec:
 rules:
 - host: yourdomain.dev
   http:
     paths:
     - path: /
       pathType: Prefix
       backend:
         service:
          name: echoserver
          port:
           number: 80
 tls:
 - secretName: yourdomain-dev-issued-tls
   hosts:
   - yourdomain.dev
---
apiVersion: apps/v1
kind: Deployment
metadata:
  name: echoserver
spec:
  replicas: 1
  selector:
    matchLabels:
      app: echoserver
  template:
    metadata:
      labels:
        app: echoserver
    spec:
      containers:
      - image: gcr.io/google_containers/echoserver:1.0
        imagePullPolicy: Always
        name: echoserver
        ports:
        - containerPort: 8080
---
apiVersion: v1
kind: Service
metadata:
  name: echoserver
spec:
  ports:
  - port: 80
    targetPort: 8080
    protocol: TCP
  selector:
    app: echoserver
The key things to note is that the Ingress has annotations for HAProxy and for Certificate Manager on it. No other configuration is required for HAProxy to recognize this as a domain to accept.
Certificate Manager looked at the secret name “yourdomain-dev-issued-tls” and automatically went out to Let’s Encrypt and stored a certificate to use. How to get the certificate is stored in the referenced ClusterIssuer.
daniel@bequiet:~$ kubectl describe secret/yourdomain-dev-issued-tls
Name:         yourdomain-dev-issued-tls
Namespace:    default
Labels:       <none>
Annotations:  cert-manager.io/alt-names: yourdomain.dev
              cert-manager.io/certificate-name: yourdomain-dev-issued-tls
              cert-manager.io/common-name: yourdomain.dev
              cert-manager.io/ip-sans:
              cert-manager.io/issuer-group: cert-manager.io
              cert-manager.io/issuer-kind: ClusterIssuer
              cert-manager.io/issuer-name: yourdomaindev-clusterissuer
              cert-manager.io/uri-sans:

Type:  kubernetes.io/tls

Data
====
tls.key:  1679 bytes
tls.crt:  3428 bytes
As part of acquiring that certificate, the DNS-01 challenge involved some records edited on AzureDNS and that seemed to happen.
Echoserver’s response for ”https://yourdomain.dev/” using Mozilla Firefox.
CLIENT VALUES:
client_address=('10.133.205.197', 56786) (10.133.205.197)
command=GET
path=/
real path=/
query=
request_version=HTTP/1.1

SERVER VALUES:
server_version=BaseHTTP/0.6
sys_version=Python/3.5.0
protocol_version=HTTP/1.0

HEADERS RECEIVED:
accept=text/html,application/xhtml+xml,application/xml;q=0.9,image/webp,*/*;q=0.8
accept-encoding=gzip, deflate, br
accept-language=en-US,en;q=0.5
cache-control=max-age=0
dnt=1
host=yourdomain.dev
te=trailers
upgrade-insecure-requests=1
user-agent=Mozilla/5.0 (X11; Ubuntu; Linux x86_64; rv:84.0) Gecko/20100101 Firefox/84.0
x-forwarded-for=192.168.0.49
x-forwarded-proto=https
Summary
DNS and certificates is happening quite nicely so far, not that this is a heavy test.
Problems so far
This blog series isn’t a tutorial, it is a story. And as with any good story, obstacles arise.
The first crippling mistake was found yesterday when the networking between services and pods just absolutely started with unexpected behavior. As it turns out, a podSubnet during kubeadm init of 10.0.0.0/8 was conflicting with the serviceSubnet of 10.96.0.0./12. To correct this, I changed the podSubnet to 10.112.0.0/12 to avoid conflict
Series: Kubernetes at home
- Kubernetes at home - Part 1: The hardware - January 02, 2021
- Kubernetes at home - Part 2: The install - January 05, 2021
- Kubernetes at home - Part 3: HAProxy Ingress - January 05, 2021
Kubernetes at home - Part 4: DNS and a certificate with HAProxy Ingress - January 07, 2021
- Kubernetes at home - Part 5: Keycloak for authentication - January 16, 2021
- Kubernetes at home - Part 6: Keycloak authentication and Azure Active Directory - January 17, 2021
- Kubernetes at home - Part 7: Grafana, Prometheus, and the beginnings of monitoring - January 26, 2021
- Kubernetes at home - Part 8: MinIO initialization - March 01, 2021
- Kubernetes at home - Part 9: Minecraft World0 - April 24, 2021
- Kubernetes at home - Part 10: Wiping the drives - May 09, 2021
- Kubernetes at home - Part 11: Trying Harvester and Rancher on the bare metal server - May 29, 2021
- Kubernetes at home - Part 12: Proxmox at home - December 23, 2021


